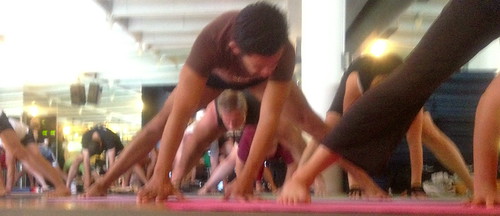
Why Master Yoga?
Yoga, is the magic word, which has guided humans all over the world towards better health, peace of mind, and even prosperity. So to master Yoga is to gain the power to transform your life to an amazing feeling of serenity and calmness.
Not many are aware of the powers of yoga and the asana recommended by this unique therapeutic science. There are also many who don’t even know what yoga is and have their own notions about it based on what they have heard or seen. Before you start your journey to master yoga, it’s important to understand what it means and its basic facts.
This will make sure you absorb the goodness of yoga into your soul and are able to practice this science in the perfect way so as to gain maximum benefits.
What comes to your mind when you hear the word “Yoga”? Well, you may think of some images of women in a few seemingly impossible poses. If this is what you think yoga is all about, then you may just have an inkling of this amazing science. And yes, that’s it – just inkling. You got to go a long way before you fully understand and master Yoga.
FYI: Yoga is not just for women!
Read more on who should master yoga here.
This article will focus on the following:
- Reasons you should practice and master yoga.
- Benefits derived.
- Yoga poses and the mistakes to avoid.
It’s my firm belief that it will provide you with all the answers to your questions.
Master Yoga and Your Life
Although it can be divided or combined depending on your instructor, there are six primary forms of yoga: Hatha, Vinyasa, Power, Ashtanga, Bikram, and Iyengar yoga.
Hatha is the most common and easiest form of yoga. It combines breathing techniques and basic movements. Vinyasa yoga combines multiple poses that smoothly transition into one another. Power yoga is an intense form, designed to build muscles quickly.
Ashtanga is similar to Vinyasa yoga in that it combines multiple poses that smoothly transition into one another; it is unique in that the poses include special breathing techniques. Bikram is a collection of 26 yoga poses designed to be performed in very hot temperatures.
Finally, Iyengar yoga utilizes objects like blocks or chairs to align the body in the proper position. In this article, we will focus primarily on the first form, Hatha Yoga.
If you are already a committed practitioner of yoga, you probably will use established routines and will have successfully worked yoga into your life.
Master Yoga for Any Lifestyle
Is yoga the right type of workout for you? I would assert that to master yoga means it can accommodate any lifestyle. There are aspects of yoga that can be implemented in the office, on a plane, at your desk, pretty much anywhere. Because it doesn’t require special equipment to master yoga, it is easy to maintain your daily practice when you travel.
Even if your life is hectic, you can (and should) introduce yoga into your daily routine, if only for five minutes at a time.
If you already have a solid workout routine, all the better; Yoga can easily be tacked on to either end of your workout. You can regularly practice and master yoga whether you have a set schedule or one that varies wildly. It makes no difference whether you live in the mountains, on the beachfront, or in between.
Whether you live in a studio apartment or a 20-bedroom mansion, you can still find space for yoga! In other words, there’s really no excuse not to include yoga as part of your life. It’s so beneficial, why not give it a shot?
When and Where
If you already have a regular workout routine, you can easily introduce a single yoga position into your cool-down. Use a single pose for several days, before moving on to anything else. This gives
your body time to adjust to the new positioning and truly learn its process, which can be more challenging than it appears on the surface.
The “when” and “where” of yoga don’t matter as long as it’s consistent. The consistent practice of yoga is what makes it effective. Many people find that waking up a half-hour earlier than
usual to incorporate a yoga routine into their lives produces noticeable results.
Yoga is a great way to get your day started. Other people rely on yoga in the evening, claiming it helps them fall asleep easier. Don’t have time to wake up a half hour early? You can also practice and master yoga at work if your environment allows. Many of the poses can be performed while sitting on a chair. You can execute others while standing or waiting in line.
The only restriction: do not practice yoga within a couple hours of eating.
To make it easier to practice and master yoga whenever and wherever opportunity presents itself, I recommend keeping a yoga mat and a set of comfortable workout clothes in your car. You never know when they’ll come in handy.
Even though you can do yoga everywhere and anywhere, I recommend that you set aside a comfortable space in your home just for yoga. If you don’t have the space to devote a whole room to yoga, you can at least clear a portion of a room – preferably with a wall, as it will come in handy for occasional support.
Your Master Yoga Plan
This Holistic Approach Will Help You Achieve Optimum Health, Mindfulness, And Spiritual Enlightenment.
The next step is to establish a plan. If you are just beginning to explore yoga, it is important that you enter the practice gently. To master yoga, your body needs time to ease into the changes you are introducing to it. At the same time, your body needs to experience yoga on a regular basis, so you can begin to discover its benefits in your body, your mind, and your spirit.
A gentle introduction to yoga would be to give yourself five minutes a day to enter into one or two of the poses. Yes, five minutes is all you need at first.
Timing
Tack it onto one of your existing routines. For example, if you have a set routine you follow for the start of your day, five minutes of yoga added on can help you clear your mind and rev up your body, preparing for action.
On the other hand, you might have a series of activities you normally follow before you go to bed. You can include five minutes of yoga. It will help you relax and can prepare your mind and body for a good night’s rest.
Start with one or two poses that work for you. After a couple weeks, try out another pose or two. As you begin to master yoga and notice the benefits in the form of greater alertness and flexibility, etc., feel free to expand your yoga time to 10 minutes a day or longer.
Once you reach the point that you are expanding your yoga practice to 20 or 30 minutes at a time, you should consider giving yoga a time slot of its own.
Sure, you can keep yoga for the start or end of your day, but if you find it is cramping your mornings or evenings, feel free to experiment with other times of day. I suggest you continue using one or two yoga positions to help you wake up and to prepare you for sleep; at the same time, give yourself at least three set blocks of time a week to devote to more extended yoga practice.
To master yoga, your body needs time to ease into the changes you are introducing to it. At the same time, your body needs to experience yoga on a regular basis, so you can begin to discover its benefits in your body, your mind, and your spirit.
Beginner Mistakes to Avoid
Yoga can provide you all sorts of benefits including physical and mental stress relief, slowing the aging process, mood improvement, along with relaxation and peace. However, beginners, usually out of over-enthusiasm, often make some mistakes at understanding and practicing to master yoga and try the poses without proper guidance.
Not just the beginners; but some experienced yogis also make some mistakes while practicing to master yoga postures.
They can surely benefit from some fine-tuning and by knowing the following common yoga mistakes:
1. Pushing too hard
It has been noted that most people know when they are trying to push themselves too hard; but they like doing it. This is so because when we think of exercise, we have one common theory and that’s
“No pain no gain”.
Even when we exercise in a gym, we do not feel satisfied with the workout unless our muscles start to cry uncle. But, yoga is the exact opposite. If your muscles are cringing with pain, then it’s a sign that you’re on the fast track to injury and muscle strains.
Yoga asanas should never cause pain. Yoga is about awareness. It’s about listening to the subtle signals your body sends you and you have to respond accordingly. So, if it starts to get painful, you must back off.
Yoga is about awareness. It’s about listening to the subtle signals your body sends you and you have to respond accordingly.
2. Comparing yourself to others
When you start to master yoga at home or in a class, you’ll find some super flexible yogis or their pictures that seem to master every move effortlessly. You are bound to feel intimidated by their flexibility and would love to reach that stage. However, it doesn’t come easily. It needs years of practicing.
To master yoga means never having to compare yourself with others. Doing so will only cause a lot of frustration and you may end up convincing yourself that yoga is not for you. Hence, you must fight the urge to compare yourself with the experienced yogis and get down on yourself.
3. Picking up a wrong spot to practice
If you are planning to attend yoga classes, which place do you think would be best? Of course, you would like to be in the front! Right?
Wrong!
If you want to place your mat wisely, then go to the back of the class. You do not need to be in the front to see the instructor because most of the time, he or she will be moving around and helping people correct their pose.
You can also try the row previous-to-the-last. Some moves may require you to face the back of the room. So, being in the last-but-one row will guarantee that you always have someone to follow without disturbing your form to look over to the side.
4. Practicing asanas with a full stomach
You should never practice yoga poses on a full stomach. When you have a full stomach, the poses can get uncomfortable. Besides, the blood supply that is funneled to your digestive organs can leave your muscles shortchanged on the energy needed for a successful practice.
Well, we agree that food is like fuel for our bodies. But, the key to benefitting from this fuel is to eat about an hour before your session and to keep the portion size down. This will make sure the blood has enough time to digest the food, pick up the energizing nutrients, and pass them to the muscles before your first pose.
5. Practicing asanas every day
Yoga is a strength-building activity. But, you have to give your muscles some time to recuperate from the micro-tears that occur with each workout, especially in the beginning. Hence, you are advised to practice yoga every other day when you are just starting out; otherwise, your muscles will be exhausted.
6. Not warming up properly
Time crunch is an unavoidable part of our routine. This time crunch may tempt you to skip the warm-up moves and go into a complicated posture directly. But this is sure to increase your risk of injury.
To master yoga, you must do some stretching for at least 5 minutes to warm up your body to the point where it can go into the serious poses more easily.
7. Not cooling down after workouts
Just as you need to warm up before each session, to master yoga, you also need to cool down after the session. A cool-down for at least 10 minutes is essential to help your muscles and ligaments to repair and recover before your next workout.
This will also help you to avoid fainting or dizziness that may occur due to the pooling of too much blood in the legs during standing postures.
Yoga is an everyman activity; not just because it can be practiced by anyone with a mat; but because it can be practiced from anywhere and even by the elderly people, pregnant women, and those with physical restrictions.
However, just because you can bust some of the yoga moves doesn’t mean you’re doing it the right way or getting the most out of your efforts and the time spent. When you practice yoga, it is important to look at your mistakes and work to correct them to make sure your awareness and form do not suffer.
Avoiding these common beginners’ mistakes will help maximize your benefits and reduce your risk of injury. And remember, yoga is a continuous practice and your goal should be to improve constantly to achieve perfection.
When you practice yoga, it is important to look at your mistakes and work to correct them to make sure your awareness and form do not suffer.

Master Yoga Poses
Half Wheel Pose
Half Wheel Pose is a perfect beginner for you in the workplace after a weekend of partying; that is, if you did. Even if you didn’t, the pose is an excellent way to commence your yoga practices.
The Half Wheel Pose improves digestion. As you are well aware, indigestion is the root cause of various ailments. Generous helpings of foods over the weekend can cause indigestion and can be very disturbing at work. To master yoga, start with the Half Wheel Pose and move on.
Procedure:
- Stand straight with the feet placed together and hands by your
sides. - Inhale as you lift your arms over your head and back.
- Deepen your bend as much as possible.
- Remain in the pose for 20 seconds.
- If you need a support, you can place your chair behind you and
hold the backrest for an easy bend.
Benefits:
- Half Wheel Pose improves digestion.
- It tones back muscles and treats back pain.
- It strengthens your lungs and improves lung capacity.
- The pose regulates blood pressure and improves heart function.
Points to Remember:
Do not bend your knees. Keep your elbows straight as you bend your arms backward.
Standing Forward Bend
Standing Forward Bend is an excellent pose to master yoga as it stretches your whole body. Your entire body is toned.
Procedure:
- Stand straight with your hands by your sides.
- Raise your hands over your head. Let the palms face each other.
- Inhale slowly as you bend forward and reach for the ground with your fingers.
- Place your palms by the sides of your feet. You can also bring your palms behind and hold your legs or just place them at the back of the legs.
- Bring your face closer to your legs. You should aim at touching your legs with your forehead.
- Remain in the pose for 20 seconds.
Benefits:
- Standing Forward Bend relieves neck pain.
- It is effective for sciatic conditions.
- The pose alleviates stress.
- It increases blood flow to the brain and soothes the mind.
Points to Remember:
- Do not bend your knees as you try to reach for the floor.
- Many beginners tend to keep their shoulders stiff.
- Focus on your whole body and ensure that every part of your body is relaxed.
Note: Those with high blood pressure and eye problems should refrain from doing Standing Forward Bend.
Half Waist Wheel Pose
The Half Waist Wheel Pose helps you master yoga by improving hip flexibility. It is not often that you bend sideways, so performing this pose will make your hips more flexible. It strengthens your back, too.
Procedure:
- Stand with your feet together.
- Lift your hands over your head and place your palms against each other.
- Inhale.
- Exhale as you bend at your hip toward your right.
- Remain in the pose for 20 seconds.
- Repeat the same on the other side.
Benefits:
- The Half Waist Wheel Pose strengthens your lungs.
- It is effective for respiratory conditions.
- It enhances your flexibility level.
- The pose reduces waist fat.
Points to Remember:
Do not bend backward or forward while doing this pose.
Note: Those with hip injury should avoid practicing this pose.
Seated Forward Bend
Seated Forward Bend is an excellent pose to master yoga as it energizes you. It relieves stress from your neck, upper back, and shoulders. It is a must-do pose on the second day at work as you are sure to start feeling the impact of work on your back and neck. You can also perform this pose on other days of the week as well.
Procedure:
- Sit on the chair’s edge.
- Raise your hands over your head.
- Exhale and bend forward at your hips.
- Bring your arms forward to place them by the sides of your feet. You can also place them in front of your feet or bring your arms
between your legs to place your hands’ palms up under the chair’s legs. - Lower your head and let your shoulders relax.
- Remain in the pose for 15 seconds.
Benefits:
- The Seated Forward Bend stretches the spine and neck.
- It stimulates the performance of abdominal organs.
- The pose soothes the mind.
Points to Remember:
Place your abdomen and chest on your thighs. Stretch your spine as much as possible.
Note: Those with high blood pressure should place their head above their heart.
Seated Chair Twist
Yet another beautiful and effective pose to help you master yoga from the comfort of your chair. Seated Chair Twist tones your back and hips.
Procedure:
- Sit on the chair comfortably.
- Exhale and turn to your right.
- Bring your left arm toward your right side and place it on the outer side of the right thigh.
- Place your right palm behind your right buttock.
- Turn to your right and look behind your right shoulder.
- Remain in the pose for 30 seconds.
- Repeat the same on the other side.
Benefits:
- The Seated Chair Twist tones your back.
- Stimulates the abdominal organs and improves their function.
- It improves hip flexibility.
- It addresses neck pain.
Points to Remember:
Keep your feet on the floor. Do not turn the lower part of the body.
Note: Those with severe neck pain can look straight ahead instead of looking over the shoulder.
Seated Back Bend
The Seated Back Bend gives you the much-needed relaxation to your back muscles and neck. If your desk work takes up most of your time in the workplace, the Seated Back Bend can be the perfect way to give your back what it deserves.
Procedure:
- Sit in the middle of your chair seat.
- Bring your hands backward to hold the sides of your seat behind your back. Alternatively, you can hold the lower part of the backrest on either side.
- Inhale and bend backward at the hips. Let your head go as far back as possible while you arch your back.
- Remain in the pose for 20 seconds.
Benefits:
- The Seated Back Bend alleviates back pain.
- It relaxes the shoulder muscles.
- It is effective for neck pain.
- The pose improves lung capacity.
Points to Remember:
Do not lift your heels. Keep your feet firmly on the floor. Keep the elbows straight. If you feel that your shoulders are hunched, adjust your seating position accordingly so that your shoulders are relaxed.
Chair Pose
Another pose to help you master yoga is the Chair Pose. Though named Chair Pose, the interesting and challenging aspect of the pose is that you are to sit in an imaginary chair. The Chair Pose is great for immunity. Here is how you do it.
Procedure:
- Stand straight with your hands by the sides. Maintain a feet width distance between your feet.
- Lift your hands forward and have them in level with your shoulders. You may alternately stretch your hands over your head.
- Exhale slowly as you lower your butt to assume a sitting posture on an imaginary chair.
- Remain in the pose for 1 minute.
Benefits:
- Chair Pose improves immunity.
- It tones your spine and back.
- It strengthens your legs.
- The pose strengthens hip flexors, calf muscles, and ankles.
- It supports heart health.
- It stimulates abdominal organs and boosts their performance levels.
Points to Remember:
Do not bend too forward. Try to lower your butt as much as possible without going too forward.
Note: People with low blood pressure and insomnia should avoid practicing Chair Pose.
Revolved Chair Pose
A variation of Chair Pose, the Revolved Chair Pose can aid in getting the best out of you. Practice the pose to identify the challenger in you.
Procedure:
- Stand straight with your feet together.
- Exhale as you bend your knees and lower your butt.
- Let the kneecaps be directly above your toes.
- Twist your hip to the right and bring your left arm toward the right side.
- Place both the palms together in the salutation pose. The elbow of
your left hand should be placed on the outside of the right knee. - Remain in the pose for 30 seconds.
- Repeat the same on the other side.
Benefits:
- The Revolved Chair Pose strengthens hip flexors.
- It stretches calf muscles.
- Stimulates your abdominal organs.
- It improves digestion.
- The pose promotes detoxification.
- It tones your upper back and shoulders.
- It improves lung function.
Points to Remember:
Do not space out your feet while on the pose as many do so to maintain balance.
Note: Those who suffer from insomnia should avoid doing the pose. People with low blood pressure should also avoid practicing the Revolved Chair Pose.
Warrior II Pose
The Warrior II Pose helps to master yoga as it strengthens your legs. It is one of those wonderful balancing poses.
Procedure:
- Stand straight with about 4 feet space between your feet.
- Turn your right foot at an angle of 90 degrees to the right side.
- Bend the right leg at the knee to bring your right thigh parallel to the floor.
- Inhale and stretch your arms sideways. Let the hands be at shoulder level.
- Remain in the pose for 30 seconds.
- Repeat the same on the other side.
Benefits:
- The Warrior II Pose strengthens your legs.
- It improves balance.
- Alleviates back pain.
- It improves lung capacity.
Points to Remember:
The pose can be performed with or without a chair.
Note: People with high blood pressure should not practice this pose.
Mountain Pose
Mountain Pose does not seem to require much of an effort but it definitely requires your focus to perform the pose to perfection. And it has immense health benefits, too. The pose is particularly beneficial considering the level of stress you have been experiencing during the week.
Procedure:
- Sit on the chair with your spine straight and the hands on your knees.
- Inhale and stretch your arms sideways.
- Exhale as you slowly lift your arms upwards over your head.
- Interlock your fingers and turn your palms upwards.
- Remain in the pose for 30 seconds.
Benefits:
- The Mountain Pose stretches your spine and improves spine
health. - Tones your neck, shoulders, and back.
- It stretches your hips.
- It improves lung capacity.
- The pose works great for all the joints in your arms.
Points to Remember:
Keep your spine straight. Your hands should be straight over your head.
Eagle Pose
Eagle Pose improves joint flexibility and stability. The pose helps to master yoga as it aids in creating awareness of your body.
Procedure:
- Sit on a chair with your feet together and your hands resting on your thighs.
- Bring your right leg over your left leg and behind so that your right foot is curled and remains on the right side of the left leg.
- Raise your arms up to shoulder level and bend the hands to bring the palms together.
- Bring your left hand under your right hand and curl around it so that the palms are placed against each other.
- Remain in the pose for 30 seconds.
- Repeat the same on the other side.
Benefits:
- The Eagle Pose enhances inner awareness.
- It improves focus.
- It boosts your willpower and self-confidence.
- The pose strengthens your leg from thighs to feet.
- It improves digestion.
Points to Remember:
Do not let the elbows drop. Keep them in line with your shoulders.
Note: Those with severe shoulder and arm conditions need to avoid doing this pose.
Cow Face Arms
Cow Face Arms is a great way to unwind though the pose doesn’t appear that way. It relaxes your tensed shoulders and hands.
Procedure:
- Sit on a chair with the feet together.
- Bring your left hand behind your back and bend it at the elbow and raise it so that the left palm goes higher up.
- Lift your right arm over your head and bring it back.
- Clasp your hands.
- Remain in the pose for 30 seconds.
- Repeat the same on the other side.
Benefits:
- Cow Face Arms tones your arms.
- It alleviates stress in the shoulder, upper back, and arms.
- It improves digestion.
Points to Remember:
Keep the raised arm close to your ear and keep your elbow pointed upwards.
Note: Those with severe shoulder problems need to avoid practicing this pose.
This Holistic Approach Will Help You Achieve Optimum Health, Mindfulness, And Spiritual Enlightenment.
Exercises for Neck, Shoulders, and Arms
Neck pain is one of the most common conditions in many, particularly, in those who stay rooted in their chairs in the workplace. Other common complaints include shoulder pain. Arms are no exception.
Here are some simple exercises that can be performed at any time whether you’re trying to master yoga or not. Practicing them while at work will relax the muscles and alleviate stress.
Neck Exercises
Stretching your neck improves flexibility and helps to maintain a range of motion of cervical joints. Stiffness in the neck, which can cause neck pain, can be cured if neck exercises are done regularly.
1. Sit with your spine straight. Drop your chin down as much as possible. Remain in the pose for 5 seconds. Tilt your head backwards and remain in the pose for 5 seconds. Repeat 5 times.
2. Sit straight. Tilt your head to your right. Hold the pose for 3 seconds. Get back to position. Now tilt your head in the opposite direction. Remain in the pose for 3 seconds. Repeat 5 times.
3. Sit straight. Keep your shoulders relaxed and turn your head to your right. Remain in the pose for 5 seconds and slowly turn your head to your left. After 5 seconds, return to the normal position. Repeat 5 times.
4. Sit straight. Drop your chin down and turn your head to your right. Roll your neck back and to your left and return to the starting point. Do the circular movement 5 times and repeat it in the counter-clockwise direction.
Shoulder Exercises
Shoulder exercises relieve stiffness in your shoulders and cure pain. These exercises are also helpful in treating pain in the upper arms. Doing shoulder exercises regularly helps to improve your range of movement.
1. Raise your shoulders as high as possible and drop them down. Repeat 10 times.
2. Place your arms on your thighs if you are seated. If you stand while doing the following exercise, you may let the hands fall to your sides. Push your shoulders back and raise them upwards. Now, bring them forward and down. You will have completed a circular movement in a clockwise direction. Do it 5 times and repeat in a counter-clockwise direction.
3. Stretch your arms sideways, at shoulder level. Bring your arms forward so that your palms touch each other without lowering the height. Return to position. Do it 10 times.
Arm Swings
Arm swings help to relieve pain in the arms. They tone your hands and improve blood circulation. Arm swings work on your shoulders, too.
1. Lift your right arm forward and straight up. Bring it back to position as you lift the left arm up. Repeat the same movements until you have completed 10 rounds.
2. Stretch your right arm forward to bring it up and behind to complete a circular movement. Do it 5 times and repeat in reverse. Do the same with your left hand.
Conclusion
It’s important for everyone to master yoga as it has become a modern-day symbol for health, peace, and serenity across the world. This mind-body practice is widely praised for its efficiency at reducing stress and boosting one’s well-being.
This ancient science also offers a broad range of physical health benefits that can rival the other forms of exercise.
Even though I am not a comparer by nature, we all agree that all forms of exercise have their pluses and minuses. If you can master yoga, you stand to gain more than from other sports due to its low impact. It has the potential to knock out the benefits of gym workouts at every level.
Further reading:
9 replies to "MASTER YOGA: A COMPLETE GUIDE"
[…] Master Yoga: A Complete Guide. […]
[…] you digest the concept and the benefits of meditation, you should learn how to combine it with yoga for even better […]
[…] are a number of different ways to do this. For example, some people enjoy doing Pilates or perhaps yoga in order to strengthen their core muscles. Others look more to […]
[…] are so many types and poses of yoga that are not all fit for every situation. So you’ll pick your style depending on your […]
[…] considering stretches, you can consider yoga moves. Yoga moves are the perfect way to loosen up your body and relax. They also help you in […]
[…] Yoga and other meditative exercises may be helpful before bed because they can relieve tension, without raising your temperature. […]
[…] and family-related aspects the best way possible. Additionally, meditation techniques included in yoga, pilates, and tai chi can really help to solve stress problems while providing both body and mind […]
[…] by running, you should start by walking. If you can’t lift weights right away, you can do yoga or just […]
I am happy to know about master yoga. Thanks for the blog.